
Loosen the axle, break the bead, lever the tire off, swap tube, remount, inflate.
If that sounds simple, it is, once you learn the rhythm. In this guide, I walk you through how to change a dirt bike tire with clear steps, pro tips, and real-world fixes.
I’ve changed dozens in the garage and at the trailhead, and I’ll show you what works, what fails, and why. Keep reading, and by the end you’ll feel confident doing how to change a dirt bike tire on your own.
Tools and setup you need
You do not need a full shop to do how to change a dirt bike tire. You need a stable stand, smart tools, and a clean space. Lay out a towel or cardboard to catch parts. Keep valves and spacers in a small tray.
Essential tools and supplies:
- Tire irons with smooth edges. Three irons make it easy.
- Bead breaker or a large C-clamp. Many use the kickstand trick.
- Rim protectors to save the rim finish.
- Valve core tool and a good air pump or compressor.
- New tube or mousse if needed. Pick the right size.
- Tire lube, soapy water, or silicone spray. Avoid harsh oils.
- Baby powder for the tube. It reduces friction and heat.
- Wrenches for axle nuts and brake caliper bolts.
- Torque wrench for safe reassembly.
- Nitrile gloves and eye protection.
Pro setup tips:
- Put the bike on a stand so the wheel spins free.
- Note the chain adjuster marks before loosening the rear.
- Mark tire rotation arrows so you mount it the right way.
Safety first and the workflow at a glance
Tires hold pressure. Work slow and keep fingers clear of pinch points. Deflate the tube fully before you pry. Keep irons shallow to avoid tube damage.
Basic workflow for how to change a dirt bike tire:
- Remove the wheel from the bike.
- Deflate, break the bead, and unseat one side.
- Pull one bead over the rim with small bites.
- Remove tube, inspect, and prep the new one.
- Mount the new tire or remount after patching.
- Seat the bead, inflate, and check for leaks.
- Reinstall the wheel and torque to spec.

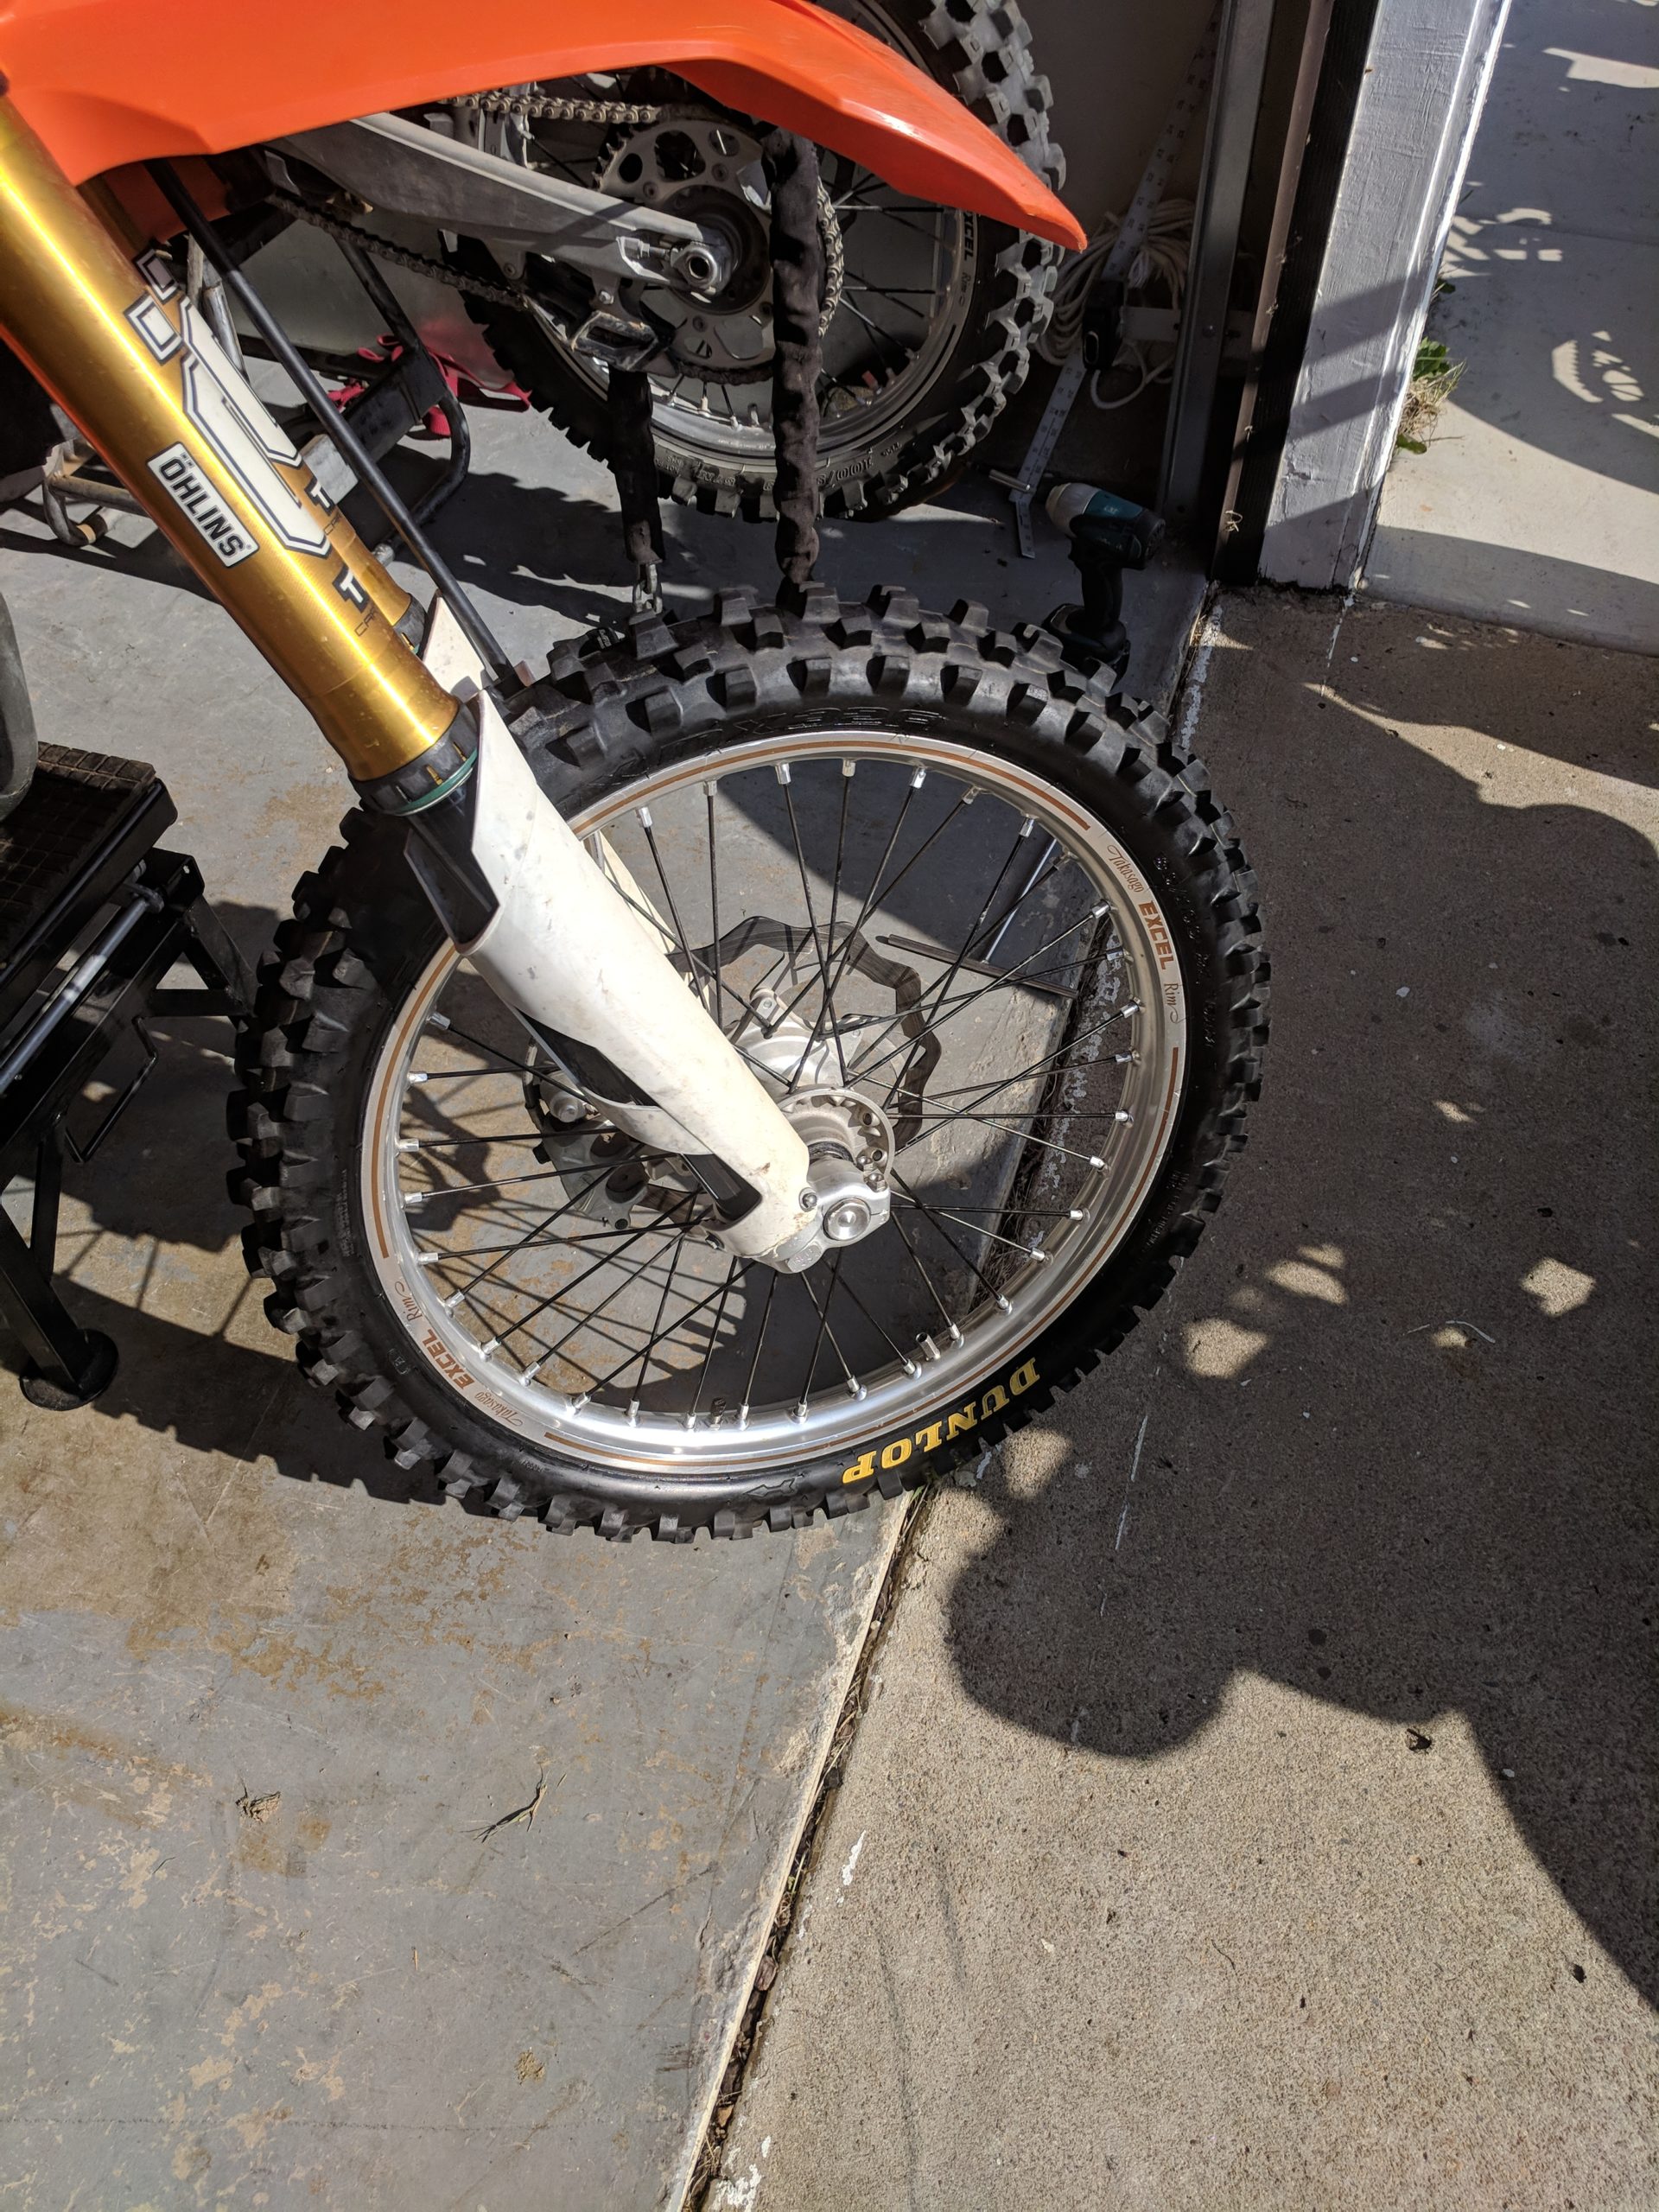
Step-by-step: Front wheel change
Front wheels are simpler. Fewer parts and no chain. This is a great place to learn how to change a dirt bike tire for the first time.
- Remove the front wheel. Loosen the axle pinch bolts, then the axle. Note spacers and any speedo drive.
- Pull the valve core to deflate the tube. Back off the rim lock but do not remove it.
- Break the bead on both sides. Use a bead breaker, feet, or kickstand. Work around the rim.
- Lube both beads. A light coat is enough. Avoid petroleum grease.
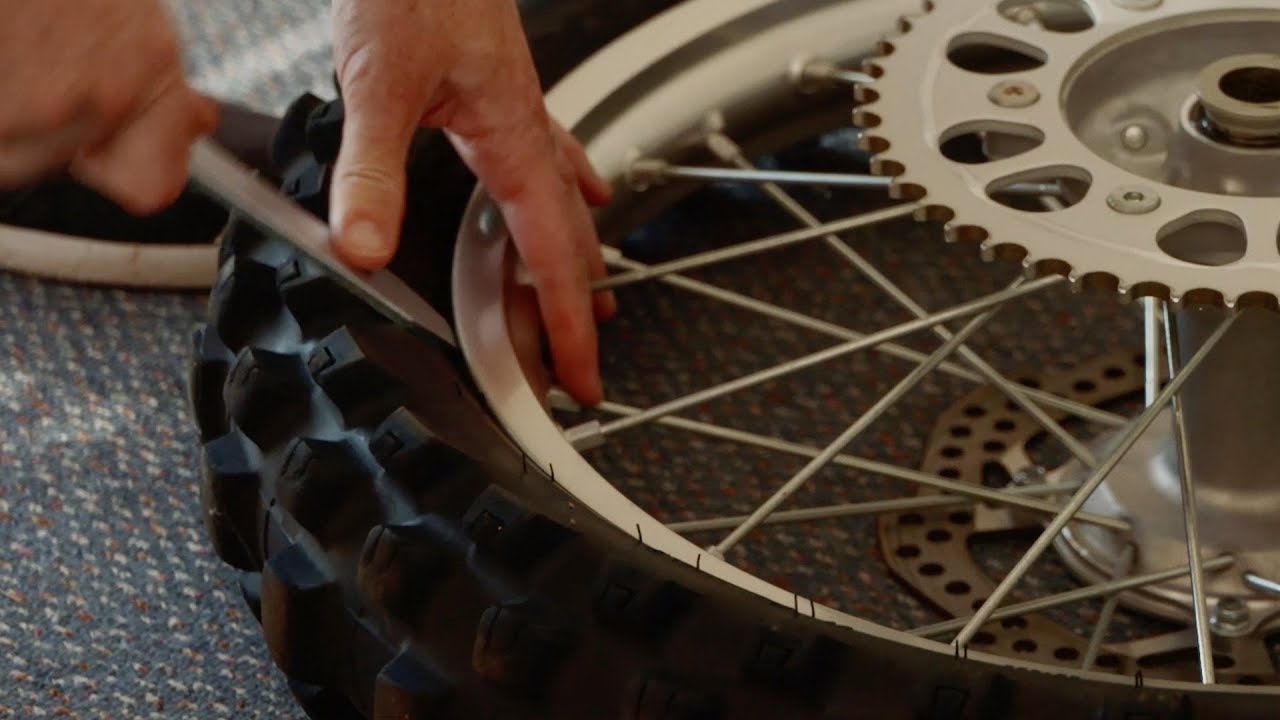
- Start opposite the valve. Use two irons to lift small sections over the rim. Keep iron tips shallow.
- Once one bead is off, pull out the tube. Check for pinch spots and thorns.
- Inspect the rim strip. Replace if torn. Make sure spoke nipples are covered.
- Place a few ounces of baby powder in the new tube. Spread evenly.
- Set one bead back on the rim if it came off. Insert the tube. Fit the valve stem through the hole and thread the cap to hold it.
- Add a few pumps of air to round the tube. Do not overinflate.
- Lever the second bead on starting near the valve, ending at the rim lock. Take tiny bites. Keep the opposite bead in the drop center.
- Snug the rim lock. Do not crush the bead.
- Inflate to seat the bead. You should hear pops. Deflate and reinflate once. Set pressure to your terrain.
- Reinstall the wheel. Align the brake rotor in the caliper. Torque axle and pinch bolts to spec.

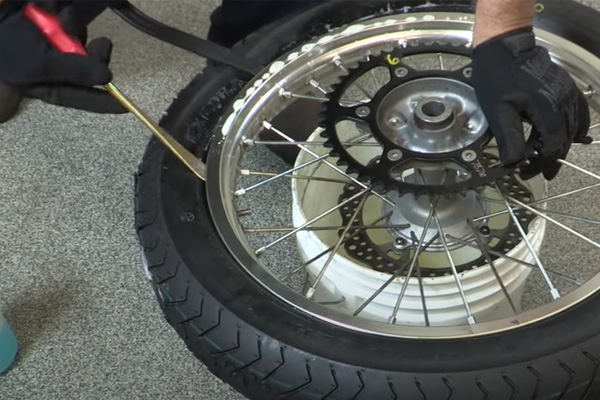
Step-by-step: Rear wheel change
Rear wheels add the chain and spacers. Take a photo of the stack so you remember it. This helps a lot when you learn how to change a dirt bike tire in the field.
- Loosen the axle nut. Back off chain adjusters a few turns.
- Slide the axle out and roll the wheel forward to free the chain.
- Remove the wheel. Keep spacers with sides marked.
- Deflate, loosen rim lock, and break the bead. Use lube.
- Remove one bead with small bites. Keep the opposite side in the drop center.
- Pull the tube. Check for nails or wire in the tire carcass.
- Clean the rim and rim lock area. Check for cracks and sharp edges.
- Prep the new tube with baby powder. Insert it and align the valve stem.
- Mount the second bead. Work toward the rim lock last. Use your knees to hold the tire down.
- Tighten the rim lock snug, not brutal. Inflate and seat the bead.
- Set pressure. Common trail range is 12 to 14 psi with a tube. Sand may need less.
- Refit the wheel into the swingarm. Loop the chain on the sprocket.
- Install the axle and spacers. Set chain tension with marks even on both sides.
- Torque the axle nut. Spin the wheel. Check the brake for drag.
Bead breaking, rim locks, tubes, tubeless, and mousse
Learning how to change a dirt bike tire means learning each system. The steps are similar, but details matter. Use what fits your riding and budget.
Breaking the bead
- Use a bead breaker, C-clamp, or the bike’s kickstand on the tire sidewall.
- Work around the rim. Add lube as you go.
- Keep the rim flat on a pad to protect the rotor.
Rim locks made easy
- Always loosen the rim lock before breaking the bead.
- Mount the final bead at the rim lock last. Push the tire down to open space for the bead.
- Tighten until it grips. Do not strip threads.
Tubed setups
- Cheap, simple, and easy to repair trailside.
- Risk of pinch flats if irons go too deep or pressure is low.
- Use heavy-duty tubes for rocks. Talc helps reduce heat.
Tubeless systems
- Great grip at low psi. Fewer pinch flats.
- Needs a perfect seal. Clean the rim and tape well.
- Use a compressor to seat. Soapy water helps.
Mousse inserts
- No flats. Great for racing and enduro.
- Heavier feel and different handling. Needs special lube.
- Shorter lifespan if overheated at high speed.
Troubleshooting and pro tips from the trail
Here is where how to change a dirt bike tire gets real. These are the problems I see most, and the quick fixes that save a ride. I learned some of these the hard way, on a rocky hill with rain coming in.
Common issues and fixes:
- Pinch flats. Keep irons shallow and take tiny bites. Add a little air to round the tube.
- Bead will not seat. More lube, more pressure in short bursts. Tap the sidewall with a mallet.
- Leaky valve stem. Replace the core. Check for grit. Keep a spare core in the tool roll.
- Tire creep on rim. Tighten the rim lock. Mark the tire at the valve to track creep.
- Stiff carcass trouble. Warm the tire in the sun. It changes everything.
My quick checklist:
- Rotation arrow correct.
- Tube not twisted.
- Rim strip intact.
- Pressure set for terrain.
- Axle and pinch bolts torqued.
Personal note: The biggest mistake I made when I first learned how to change a dirt bike tire was rushing the last six inches of bead. Slow down there. Keep the opposite bead in the drop center. Use your knees and palms more, and irons less.

Maintenance, storage, and when to replace
Good habits make how to change a dirt bike tire faster next time. They also keep you safe. Tires and tubes tell stories if you look close.
- Inspect sidewalls for cuts, cords, and weather cracks.
- Check knobs for chunking or torn bases. Replace if knobs fold easy by hand.
- Read the date code. Old rubber hardens and loses grip.
- Store tires in a cool, dark place. Heat ages rubber fast.
- After rides, remove thorns and glass. Wipe the bead area clean.
When to replace:
- Repeated flats from thin carcass or old tubes.
- Bead damage or warped rim after a hit.
- No confidence in grip. Trust matters more than miles left.

Time, cost, and smarter choices
Knowing how to change a dirt bike tire saves money and time. A shop change costs more and takes days. A garage change takes 30 to 60 minutes once you get the hang of it.
Smart choices:
- Invest in good irons once. Cheap tools bend and cut tubes.
- Carry trail tools that match your axle sizes.
- Dispose of old tires and tubes at proper recycling sites.
- Keep a patch kit in your pack. It can save a long walk.
Budget planning:
- Heavy-duty tube: moderate cost, strong value.
- Mousse: higher cost, race-level reliability.
- Tubeless kits: mid to high cost, great grip at low psi.
Frequently Asked Questions of how to change a dirt bike tire
How long does it take to learn how to change a dirt bike tire?
Most riders get it in a weekend. After a few tries, you can finish a tire in under an hour.
What pressure should I run after I change a dirt bike tire?
For tubes, 12 to 14 psi works for most trails. Sand or mud may need 10 to 12 psi.
Can I patch a tube or should I replace it?
Patches work for small holes away from the valve. Replace tubes with long cuts or damaged stems.
Do I need three tire irons for how to change a dirt bike tire?
Two can work, but three make it smoother. It reduces force and lowers the risk of pinches.
Why does my bead not seat after mounting?
You likely need more lube and airflow. Try a compressor and bounce the tire to help it pop.
How tight should the rim lock be?
Tight enough to stop tire creep, but not crushing the bead. Snug it after you set pressure.
Can I use WD-40 as tire lube?
Avoid it. Use proper tire lube or soapy water so the bead can seat without harming rubber.
Conclusion
You now have the full playbook on how to change a dirt bike tire, from tools to final torque. Keep your moves small, your tube rounded, and the opposite bead in the drop center. Practice once in the garage, then again after a ride, and it will feel natural.
Set a goal to change your next rear tire yourself. Lay out the tools tonight and plan a dry run this week. If this helped, share it with a riding buddy, subscribe for more hands-on guides, or drop your toughest tire question in the comments.