
Use fresh fluid, pump the lever, crack the bleeder, and repeat until bubble-free.
Bleeding dirt bike brakes is a simple job when you follow a clear method. In this guide, I explain how to bleed dirt bike brakes like a pro, with step-by-step methods, tools, and tips from the workshop. You will learn what works, what to avoid, and how to get a strong, safe lever feel every ride.
Safety and tools checklist for how to bleed dirt bike brakes
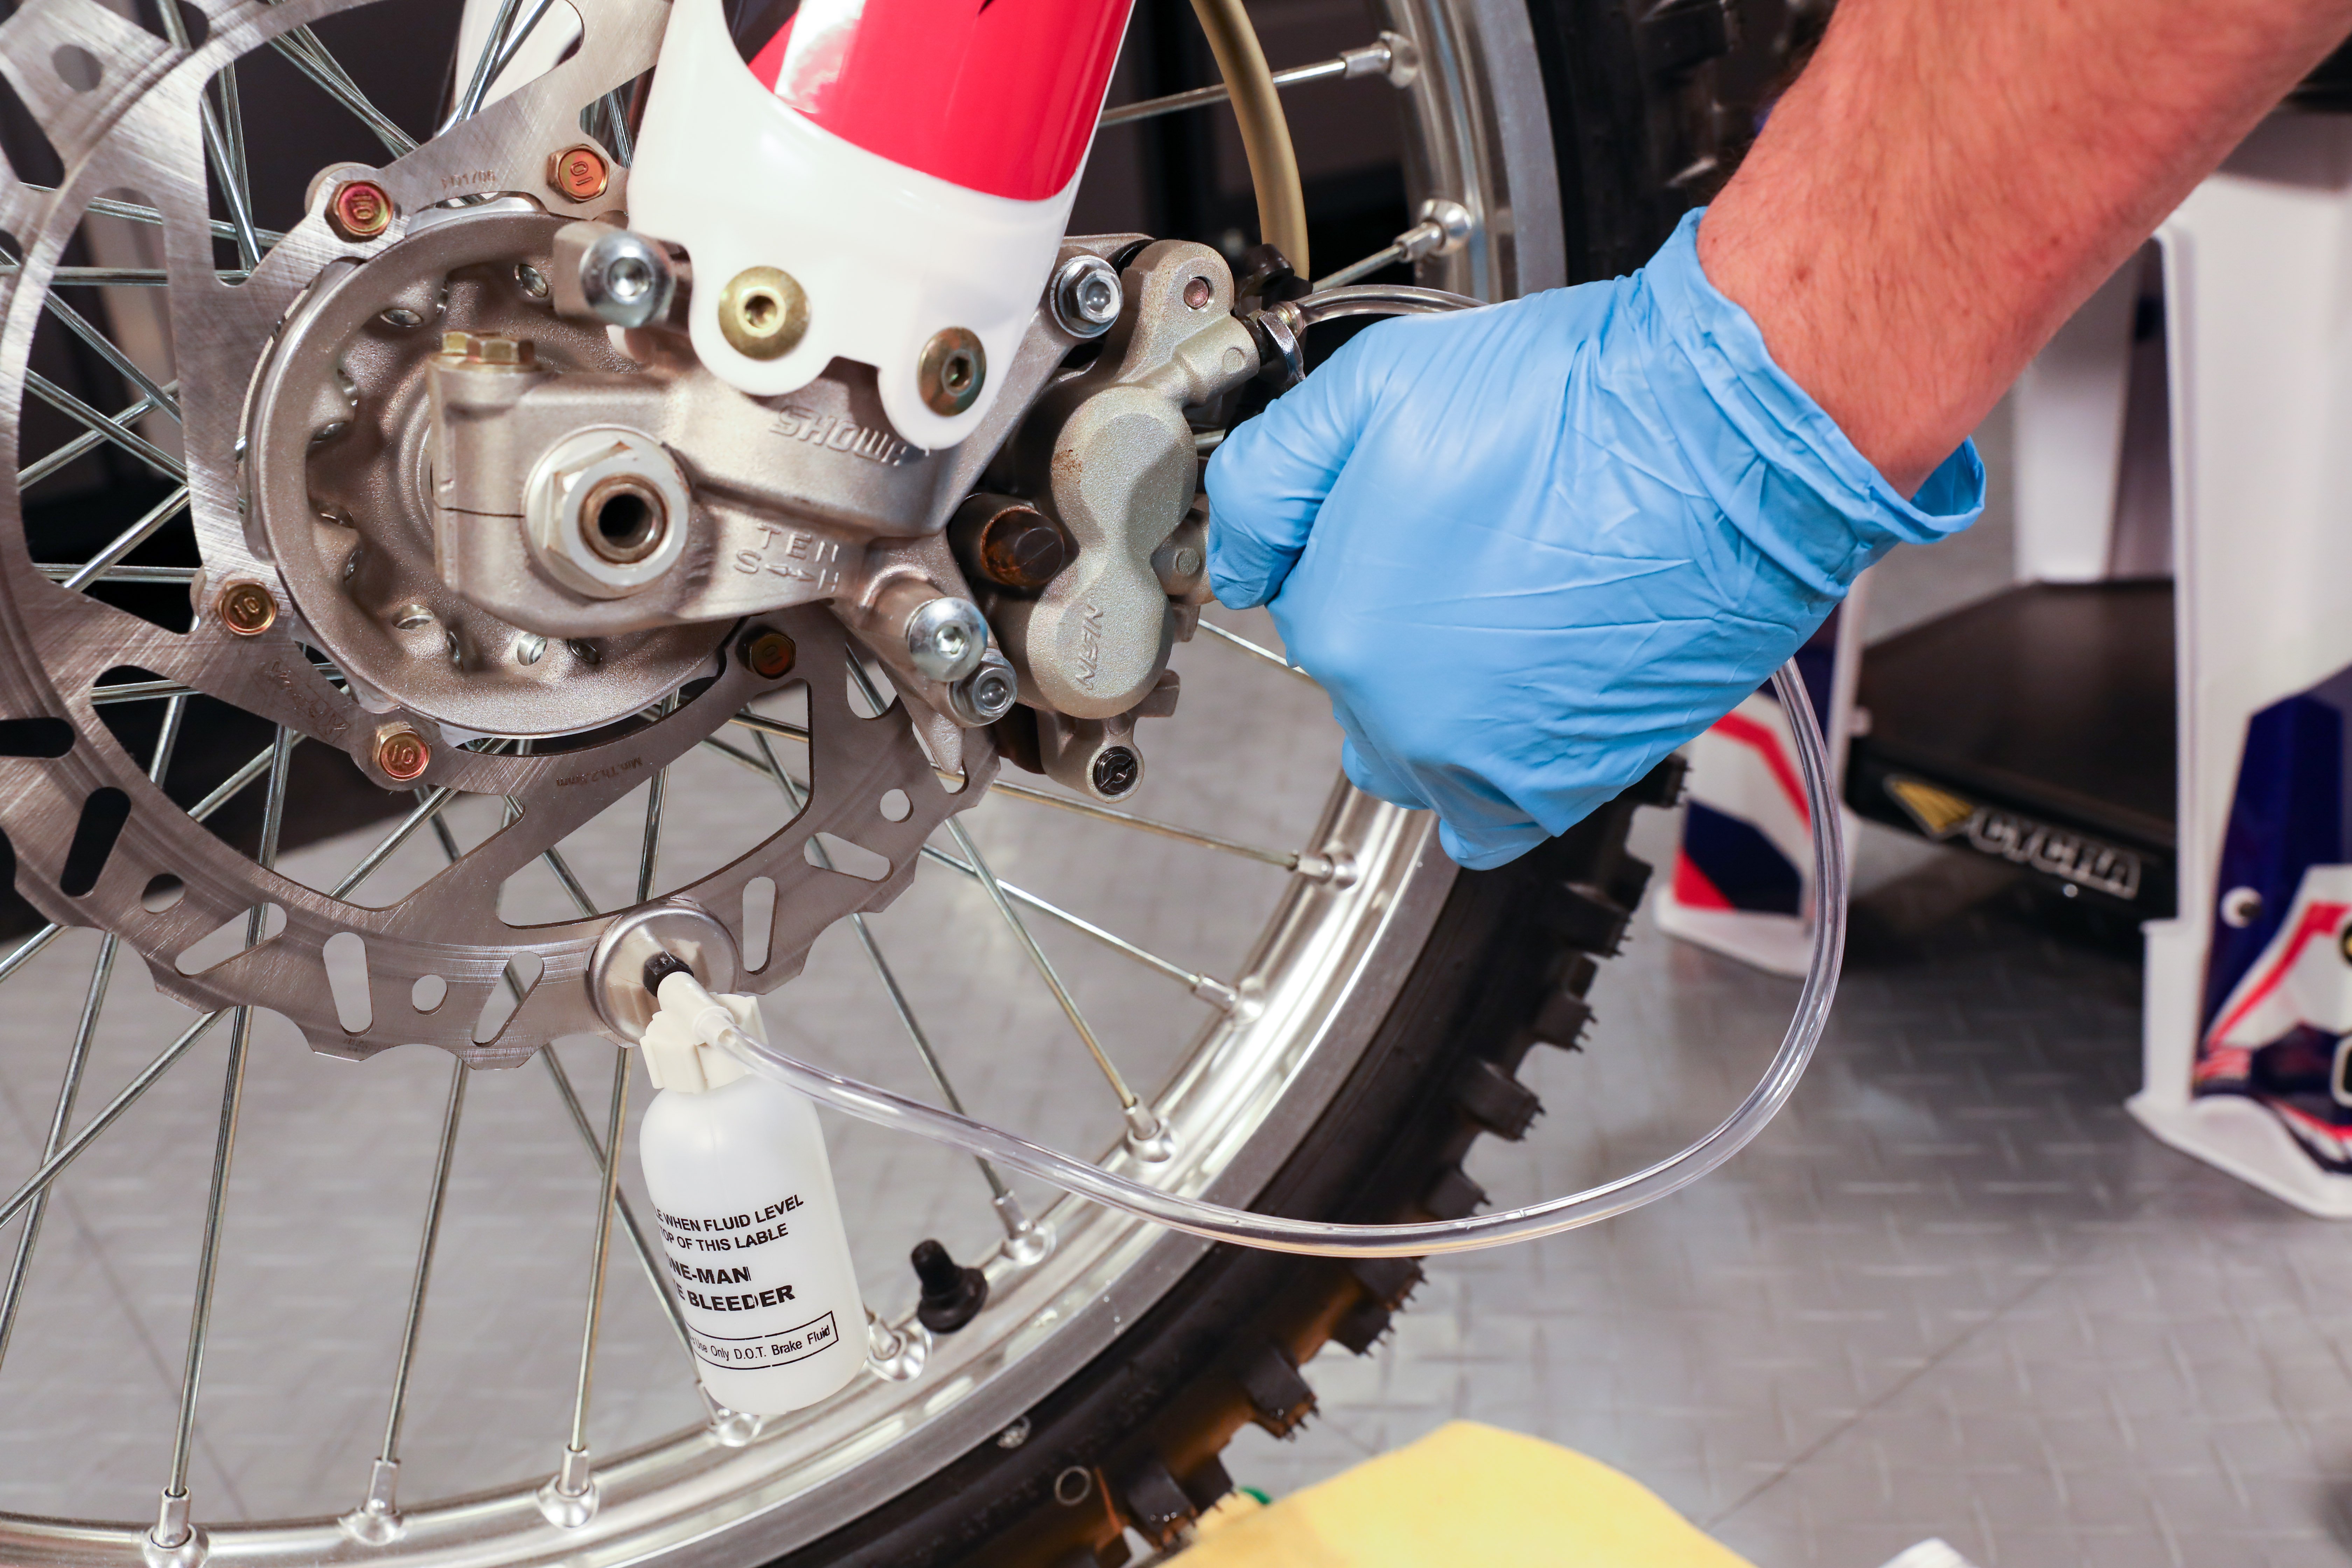
Before you start, protect yourself and your bike. Brake fluid is corrosive and attracts water. Work in a clean space and wear gloves and eye protection.
You will need:
- Fresh brake fluid that matches your cap and manual. Most dirt bikes use DOT 4 or DOT 5.1. Never mix DOT 5 silicone with other types.
- Line wrench for the bleeder screw, usually 8 to 10 mm. This helps prevent rounding.
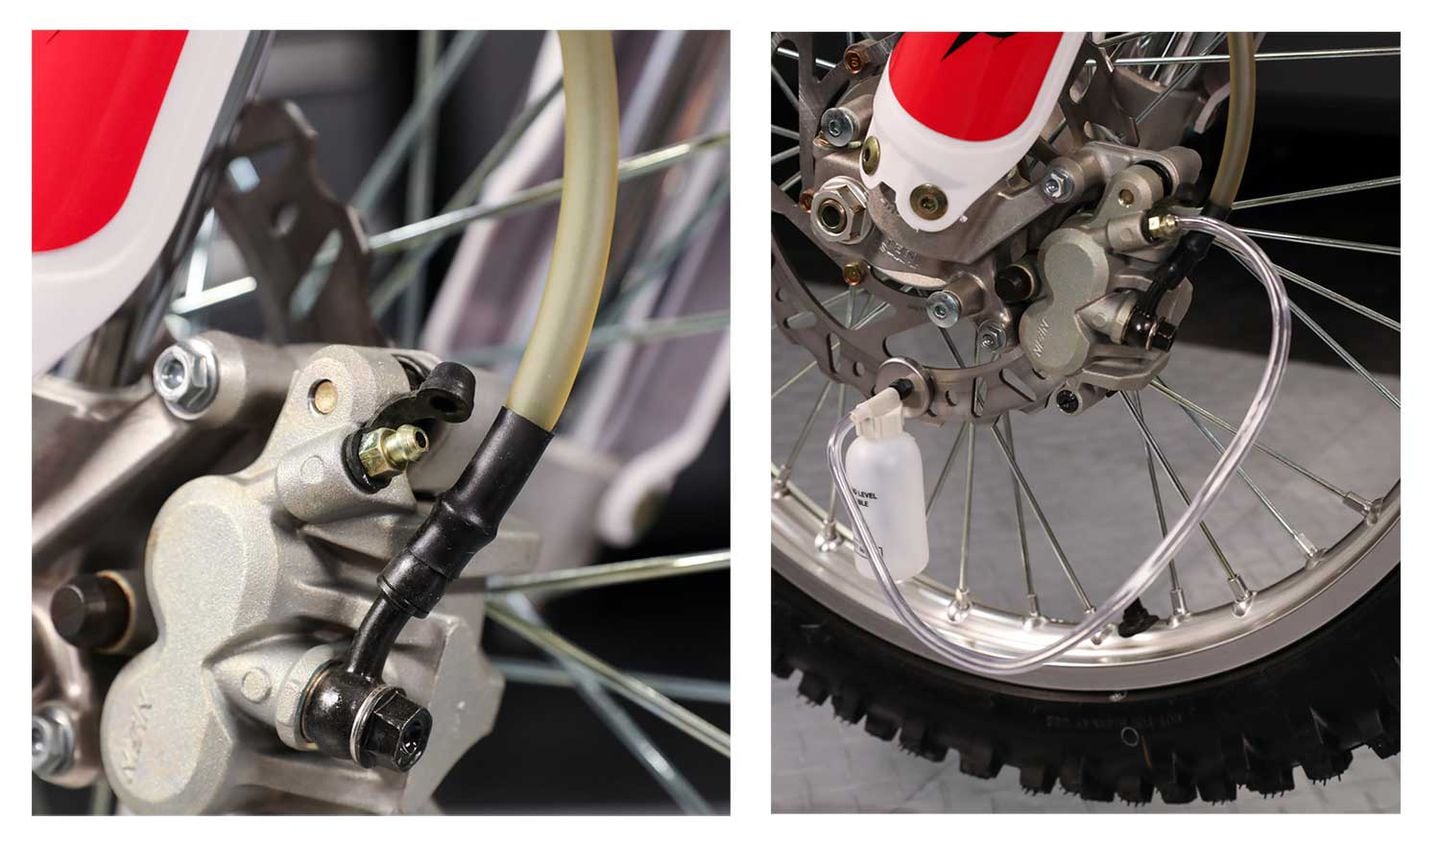
- Clear vinyl tube that fits snug on the bleeder and a catch bottle.
- Paper towels, brake cleaner, and rags to keep parts clean.
- A torque wrench for the bleeder screw and caliper bolts.
- Optional tools like a vacuum bleeder or a large syringe for reverse bleed.
If you are learning how to bleed dirt bike brakes for the first time, keep the process slow and neat. Clean gear and correct fluid make the job easy and safe.

Understand your brake system before you bleed
A dirt bike brake system is simple. The master cylinder moves fluid through the line to the caliper pistons. The pistons push the pads into the rotor to make friction.
Key parts to know:
- Master cylinder and reservoir. Keep it level while bleeding.
- Brake lines and banjo bolts. Copper or aluminum washers seal the joints.
- Caliper, pistons, and the bleeder screw. Air likes to sit high, near the banjo or in loops.
Some dual-sport models may use ABS, but most pure dirt bikes do not. If you have ABS, follow the factory service steps for that system.
Preparation and setup for how to bleed dirt bike brakes
Set the bike on a stand so it is stable. Turn the bars so the master cylinder is level. This helps air rise to the reservoir.
Cover plastics and bars with rags to protect from fluid. Clean the master cylinder cap and area before you open it. Dirt in the reservoir can damage seals.
Open the cap and inspect the fluid. If it is dark, flush it all. Fill with fresh fluid from a sealed bottle. Never reuse old brake fluid.

Method 1: Traditional top-down bleed
This is the classic method most riders use. It is slow but very effective.
Steps:
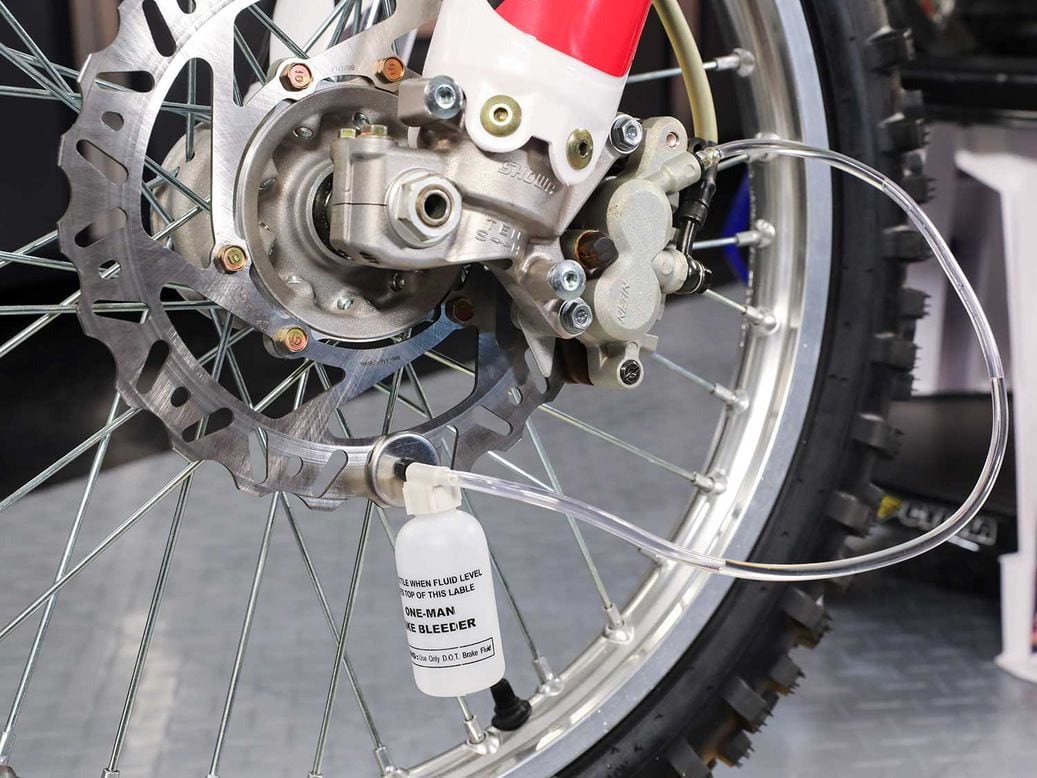
- Fit a clear tube to the bleeder and place the other end in a catch bottle.
- Pump the lever 3 to 5 times. Hold it firm.
- While holding, crack the bleeder a small turn. Fluid and air will flow out. Close the bleeder before you release the lever.
- Top up the reservoir. Do not let it run dry or you pull in more air.
- Repeat until the stream has no bubbles and looks clean.
- Lightly tap the caliper and line with a plastic tool to lift any trapped bubbles.
- Finalize by snugging the bleeder to the correct torque. Common is around 7 to 10 N·m, but check your manual. Clean all fluid from parts.
I use this method for most track days. It works great on front and rear, and it keeps the system neat and simple. If you want to know how to bleed dirt bike brakes in the most direct way, start here.
Method 2: Vacuum bleeding
A vacuum bleeder speeds up work. It pulls fluid and air from the caliper to the catch bottle.
Steps:
- Fill the reservoir and keep it topped up.
- Attach the vacuum tool hose to the bleeder. Pump the tool to create vacuum.
- Crack the bleeder and draw fluid until no bubbles appear.
- Close the bleeder, release vacuum, and remove the hose.
- Lightly pump the lever to confirm a firm feel. Top the reservoir and clean up.
Pro tip from the shop: wrap the bleeder threads with a small strip of thread tape, but avoid the tip. This stops false air leaks around the threads while you pull vacuum.
Method 3: Reverse bleed with syringe
Reverse bleed pushes fluid from the caliper to the master. It is great for stubborn air near the master cylinder.
Steps:
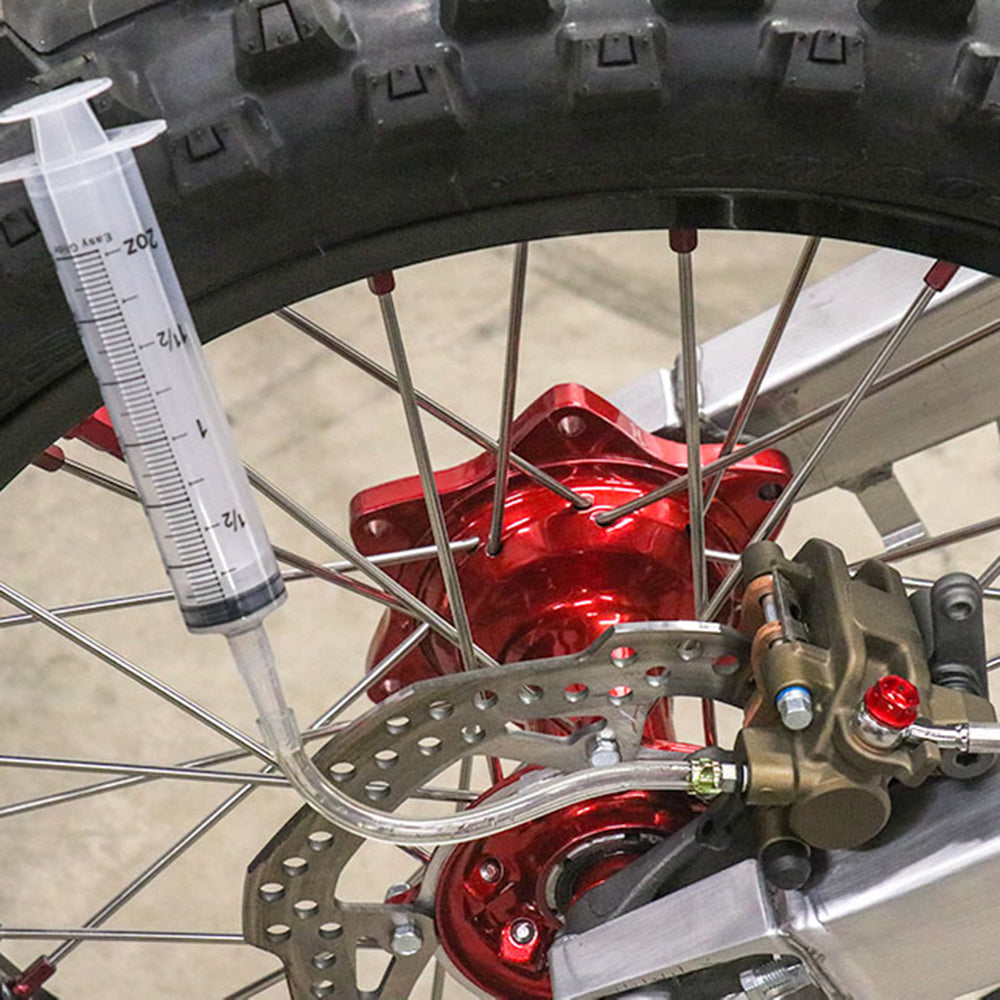
- Fill a large syringe with fresh fluid and push the air out of the syringe and hose.
- Attach the hose to the bleeder. Open the bleeder a small turn.
- Slowly push fluid up the line. Watch the reservoir and remove excess fluid so it does not overflow.
- Close the bleeder, cycle the lever, and repeat if small bubbles still appear.
- Top off the reservoir and clean any spills.
If you asked how to bleed dirt bike brakes fast after a full rebuild, this method can save time. It moves trapped air to the top where it wants to go.
How to troubleshoot spongy or no-pressure brakes?
If the lever is still soft, do not panic. Simple checks fix most issues.
Try these fixes:
- Tap the line from caliper to master to lift microbubbles. Hold the lever overnight with a small strap to help the last air rise.
- Check all joints for leaks. Look for wet spots at banjo bolts, bleeder, and line crimps.
- Crack the banjo at the master with light lever pressure to purge air trapped at the top. Wrap with a rag to catch fluid.
- Inspect pads and rotors. Glazed pads or a greasy rotor ruin feel.
- Check the master cylinder piston and seal. If the lever sinks slowly, a seal may be worn.
When you learn how to bleed dirt bike brakes, you also learn to spot air paths. Clean, tight joints and fresh fluid solve most of them.
Post-bleed checks, bedding pads, and test ride
Set the fluid level to the mark and fit the diaphragm and cap. Do not overfill. Wipe every surface and check the lever feel again.
Spin the wheel and squeeze the lever. Make sure the wheel stops and releases clean. Look for weeping at joints after a few pulls.
Bed the pads with a few light stops, then a few medium stops. Let them cool a bit between runs. This builds stable friction and a firm lever.
If a friend asks how to bleed dirt bike brakes and finish strong, I always say this: test your work in a safe spot before you ride fast.
Maintenance intervals and storage tips
Brake fluid absorbs moisture over time. Water lowers the boiling point and can cause fade on hard stops.
Use these simple rules:
- Change fluid every 6 to 12 months for trail use. Change every few race days for heavy use.
- Replace fluid after deep water crossings or mud races.
- Keep fluid sealed, cool, and dry. Discard open bottles after a season.
- Inspect lines and rubber boots at each service. Replace cracked parts before they fail.
These habits make how to bleed dirt bike brakes quicker next time, since clean systems bleed faster and feel better.
Pro tips and common mistakes from the workshop
Years in the garage taught me what works and what hurts. Here are quick wins you can use today.
- Keep the reservoir level. Air likes high spots. Turning the bars a few degrees can speed the bleed.
- Use the right fluid. DOT 4 and DOT 5.1 mix, but DOT 5 silicone does not. Read the cap and the manual.
- Do not over-torque the bleeder. A snug, clean seat seals better than brute force.
- Replace old crush washers at banjo bolts. A tiny leak ruins lever feel.
- Do not reuse dirty hose or bottles. Fine grit can score seals and pistons.
- If the lever is firm cold but fades hot, suspect fluid boil or pad glaze. Change fluid and re-bed the pads.
These small steps make how to bleed dirt bike brakes faster, cleaner, and safer.
Frequently Asked Questions of how to bleed dirt bike brakes
How often should I bleed my dirt bike brakes?
Bleed them at least once a year, or more if you ride hard. If the fluid is dark or the lever feels soft, bleed sooner.
What brake fluid should I use for dirt bikes?
Most dirt bikes use DOT 4 or DOT 5.1. Check your reservoir cap and manual, and never mix DOT 5 silicone with other fluids.
Can I bleed the rear brake the same way as the front?
Yes, the process is the same. The rear has less line length, so it often bleeds faster.
Why is my lever still spongy after bleeding?
Air may be trapped at the master or banjo bolt. Tap the lines, try a reverse bleed, or crack the top banjo while pressing the lever.
Is a vacuum bleeder better than manual bleeding?
It is faster for full flushes and rebuilds. Manual bleeding works fine for small air pockets or a quick refresh.
Do I need to replace pads when bleeding brakes?
No, not unless they are worn or glazed. But check pad thickness and rotor condition during the service.
Can I ride right after bleeding the brakes?
Yes, after you confirm no leaks and a firm lever. Bed the pads with a few controlled stops before aggressive riding.
Conclusion
Bleeding dirt bike brakes is a clean, methodical task when you follow the right steps. With the tools in hand and a little patience, you can remove air, refresh fluid, and get that crisp lever feel every rider loves. Now that you know how to bleed dirt bike brakes with three proven methods, set up your bike, take it slow, and build confidence in your own garage.
Ready to level up your maintenance skills? Try one method today, keep notes on what worked, and share your results. Subscribe for more hands-on guides, or leave a comment with your setup and questions.